Saturday, March 12, 2011
Saturday Spotlight

Friday, March 11, 2011
Feature: Silk Flower Tutorial
It's a {Feature Friday} here at CaitsCreates
This week I am featuring my thrifty and talented blogging friend, Lauren
If you are a thrifty crafter then you will LOVE Lauren's blog Young Nester. Please feel free to hop on over and check her out!
Young Nester's Silk Flower Tutorial
Supplies:
Silk (I bought a yard of black silk with polyester at Jo-Ann's fabric w/ a coupon) = $6
Scrapbooking brads (or beads or buttons or whatever) = $1
Flame (I used a large candle) = fire is free!
Magnet Strip = $1-2
TOTAL: $8-9
Are you excited yet?
.........
Start by cutting your silk into different sized circles like so:
As you can see, I just kind of winged it. No perfect circles in this house! I mean, I was about to burn the darn things... there was no way I was going to be tracing and cutting beautiful circles to BURN.
Then, hold over the flame. Pretty simple. Be sure to keep it moving over the flame and not to get it too close or it will melt your imperfect circles and this will be your outcome (prepare yourself):
This is why practice makes perfect. You don't want an Addams Family flower. You want a pretty, dainty flower.
Put it all together and this is what you've got!
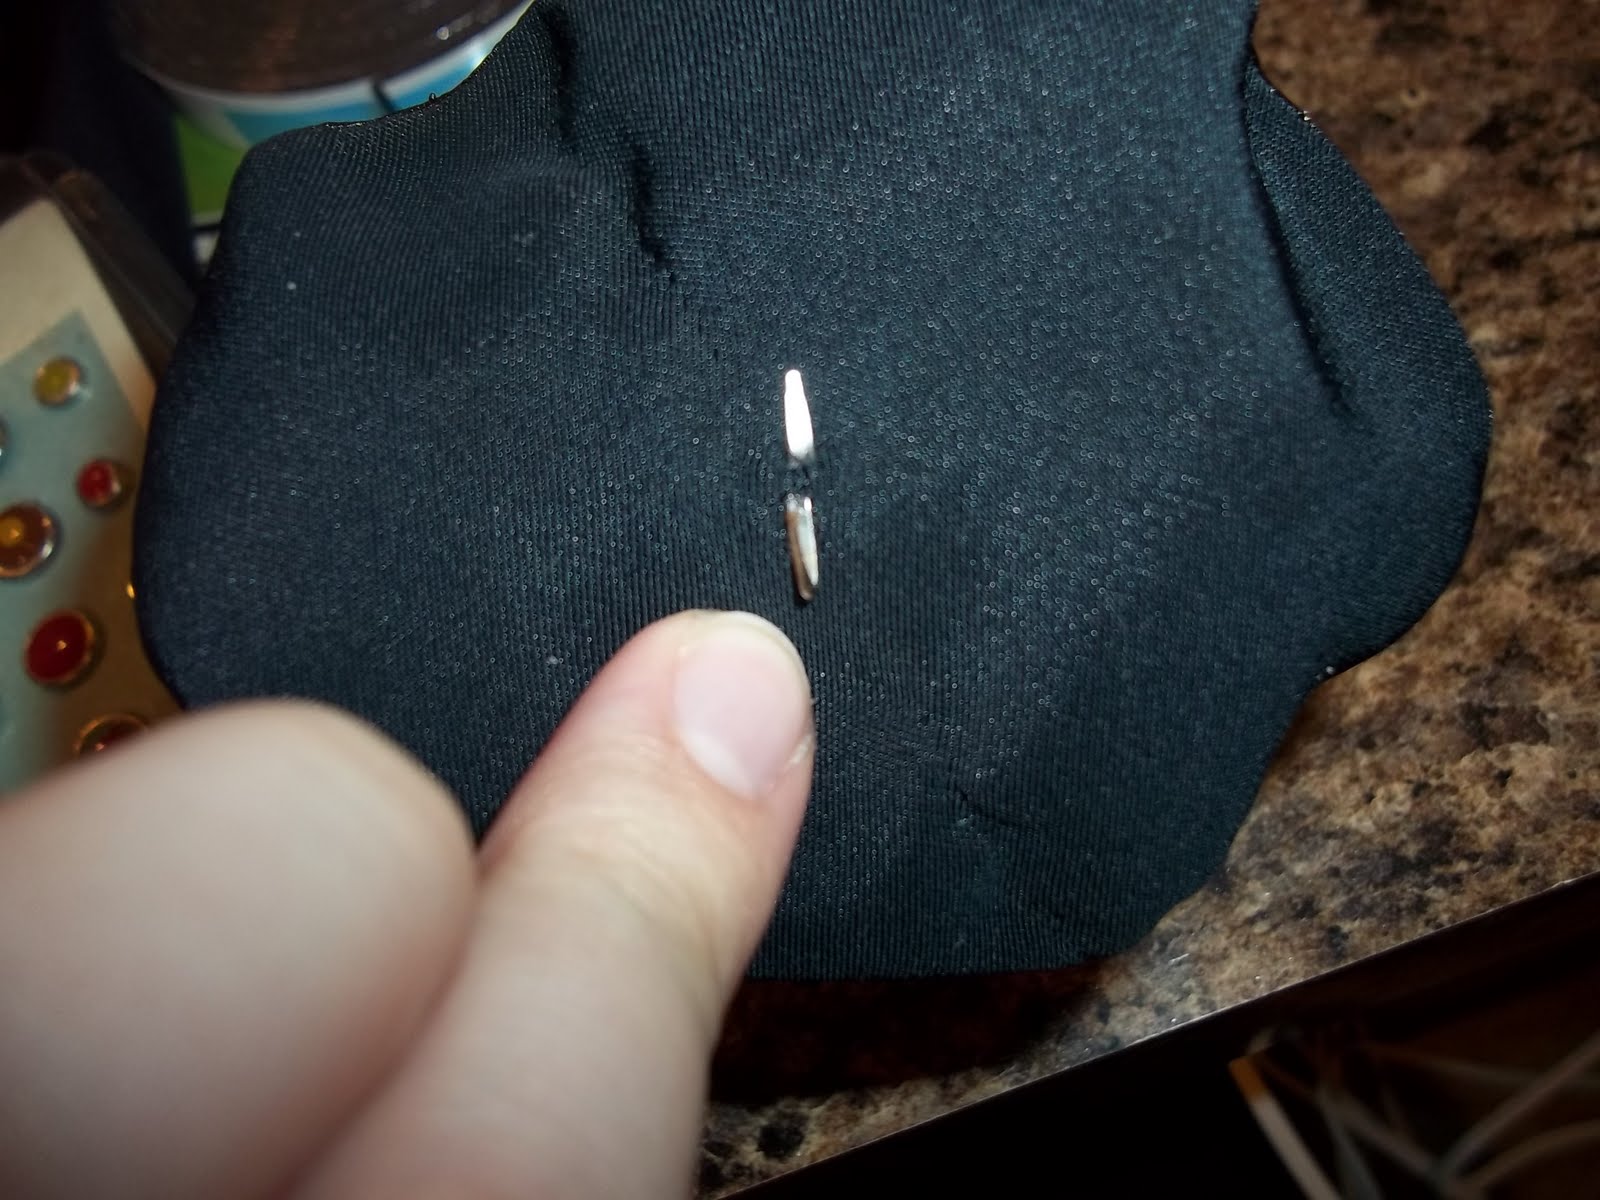
And then, to avoid my sewing machine, I used an awesome little brad and poked it through one piece of silk at a time until they were all attached.
And this is what it looks like! I've seen people sew buttons and pearls and bears, oh my. It's whatever you like! Because this was my first (successful) flower, I decided toavoid my sewing machine keep it simple.
Just in case you were wondering, this is what the back looks like with the brad all the way through.
I then decided to hot glue a piece of magnet tape to the back to make it a... magnet. Since I have the rest of the yard to make these babies (I wish I had picked white or pink), I'll probably make some for head bands, beanies, hair pins, shirt pin-ons, pillow pin-ons, etc.
Young Nester's Silk Flower Tutorial
Supplies:
Silk (I bought a yard of black silk with polyester at Jo-Ann's fabric w/ a coupon) = $6
Scrapbooking brads (or beads or buttons or whatever) = $1
Flame (I used a large candle) = fire is free!
Magnet Strip = $1-2
TOTAL: $8-9
Are you excited yet?
.........
Start by cutting your silk into different sized circles like so:
As you can see, I just kind of winged it. No perfect circles in this house! I mean, I was about to burn the darn things... there was no way I was going to be tracing and cutting beautiful circles to BURN.
Then, hold over the flame. Pretty simple. Be sure to keep it moving over the flame and not to get it too close or it will melt your imperfect circles and this will be your outcome (prepare yourself):
This is why practice makes perfect. You don't want an Addams Family flower. You want a pretty, dainty flower.
Put it all together and this is what you've got!
And then, to avoid my sewing machine, I used an awesome little brad and poked it through one piece of silk at a time until they were all attached.
And this is what it looks like! I've seen people sew buttons and pearls and bears, oh my. It's whatever you like! Because this was my first (successful) flower, I decided to
Just in case you were wondering, this is what the back looks like with the brad all the way through.
I then decided to hot glue a piece of magnet tape to the back to make it a... magnet. Since I have the rest of the yard to make these babies (I wish I had picked white or pink), I'll probably make some for head bands, beanies, hair pins, shirt pin-ons, pillow pin-ons, etc.
Thanks for sharing Lauren!
Have a wonderful weekend! Make sure to stop by on Monday...I am doing a blog swap with my friend Leasa over at Funkymom Cards and there will be a giveaway involved :)
Thursday, March 10, 2011
Quick Fix: Clock Redo
Remember this clock I got for Free?
Well it recently got a makeover and I love it :)
I simply popped the top off and took apart the clock arms to get to the background. I found this really fun piece of paper a few weeks ago at Hobby Lobby on the clearance aisle for $0.17 (6 for $1.00).
Once I got the paper in I took some black stickers and placed them around the clock to represent the numbers. I then decided to add a scrap circle to the clock, which I think made the piece really pop!
There you have it! A revamped clock all in about 30 minutes, which included the time it took to pick out the paper and color of stickers!
Total Costs
Clock.................FREE
Paper.................$0.17
Stickers.............$0.20
New Battery.....$0.25
Wednesday, March 9, 2011
St. Pats Bags
Two weeks ago I made a few fifteen of these bags for a friend of mine to sell at St. Patricks Day festivities.
They are pretty simple to make just time consuming with all the cutting out you have to do!
To start the project I found a shamrock pattern online and then scaled it to size.
I traced the pattern onto heat-n-bond and the ironed the fabric onto the opposite side (follow directions)
This is what it looked like before I pealed the backing off.
Next, I peeled the backing off and ironed it onto the bag.
Making sure to go over all the edges...
Once the shamrock was ironed on I set my sewing machine to the zig-zag pattern
I put my needle right along the edge and started to applique
I think the white really makes it pop against the black.
Tuesday, March 8, 2011
Mapping out My Adventures
Remember last week when I asked for your help HERE?
(a BIG 'Thank You' to those of you who commented or emailed me with suggestions :))
Well I have a solution!!
Tonight I was looking at places for my Europe trip and it dawned on me...I should make a map and pin-point all the places I've been!
So I did just that and here is how it turned out:
Here is the process...
I found a Europe map online and printed it off. I then drew it on to canvas material with a pencil.
(I had a picture of this, but it was too light and you couldn't really see anything)
I then attached the material to an old cork board I had with some hot glue.
Next, I traced over the map with a Sharpie and found some stickers in my box of crafts to spell out the words {Key}
I didn't have any little alphabet stickers I liked so I wrote out the rest of the key with a purple Sharpie.
I then used some fake diamond embellishments I had left over from a previous project to mark the different places on the map.
It's a little hard to see in the pictures but the places I've been are in white and the places I will be traveling to are in green.
I love it and it will look perfect on my wall! Now I just need to make one like it for my travels throughout the states!
Estimated Total Costs
Board....................FREE
Canvas..................$0.75
Sharpies................FREE
Stickers................ $0.05
Embellishments....$0.10
Glue.....................$0.10
Total....................$1.00

Subscribe to:
Posts (Atom)